
A charter bus seating chart maps every passenger, luggage allocation, and accessibility spot to a certified seat on your specific coach, and getting one usually starts with a quick download rather than a blank sheet of paper. The most common printable templates cover 56, 54, 40, 30, and 20-seat coaches, matching the sizes charter operators run most often. If you already know your headcount, your fastest next step is to grab the template matching your group size or ask your operator for the exact floorplan of the bus they’re sending, since two “56-passenger” buses can have different configurations depending on restroom placement or ADA equipment.
Key Takeaways
A charter bus seating chart works only when it’s built on the operator’s verified floorplan, not a generic downloaded template, since amenities like restrooms and ADA equipment routinely change the real seat count.
| Point | Details |
|---|---|
| Download the right size first | Start with a 56, 54, 40, 30, or 20-seat template matching your confirmed vehicle class. |
| Add a booking buffer | Reserve 10 to 15% extra capacity or at least two open seats for last-minute changes. |
| Confirm restroom and ADA impact | Restroom modules and securement points can reduce headline capacity by 2 to 4 seats. |
| Zone by need, not alphabetically | Assign front rows for mobility needs, middle for key guests, rear for general passengers. |
| Work with a local operator | Reliant Transportation confirms exact floorplans for groups across Portland, the Willamette Valley, and Hood River. |
Table of Contents
- What Charter Bus Sizes Mean for Your Seating Chart
- How Are Charter Bus Seats Configured?
- Where Can You Download a Bus Seating Chart Template?
- How Do You Create a Seating Chart for a Group Trip?
- What Should You Know About Accessible Seating?
- Which Seats Are Best, and What’s the Etiquette?
- Reading a 56-Passenger Seating Chart: An Annotated Example
- Print This Checklist Before You Leave
- What Operators Wish Organizers Knew About Seating Charts
- Get Your Seating Chart Built Around Your Actual Bus
- Frequently Asked Questions
- Sources
What Charter Bus Sizes Mean for Your Seating Chart
Before you can fill out a seating chart, you need to know which vehicle class you’re working with. Charter buses fall into three practical categories, and picking the right one shapes everything downstream, from your template choice to your luggage plan.
- Minibus (roughly 18 to 25 seats): best for small wedding parties, corporate shuttles between two nearby venues, or airport runs where a full-size coach would be overkill.
- Mid-size coach (roughly 28 to 38 seats): a solid fit for bridal parties with out-of-town guests, youth sports teams, or a single-department office outing.
- Full-size motorcoach (roughly 40 to 56 seats): the standard for wedding guest shuttles, wine country tours through the Willamette Valley, and multi-team athletic trips.
These ranges come from how the charter bus industry generally categorizes fleet size, and they’re a starting point, not a guarantee. Always confirm the exact seat count with your operator before finalizing a chart.
Once you know your headcount, add a buffer. It is advisable to include some extra capacity or at least a couple of open seats to absorb last-minute plus-ones, a vendor who needs a ride, or a chaperone you forgot to count. If your group is under 10 people, scheduled transportation options often make more financial sense than a private charter. Somewhere between 10 and 20, it’s a toss-up depending on timing and luggage. Past 20 people, a private charter usually wins on both convenience and cost per person, especially once you factor in gear, garment bags, or gift tables that need their own space.
How Are Charter Bus Seats Configured?
Most full-size motorcoaches run a 2-and-2 configuration: two seats on each side of a center aisle, four seats per row. Some premium coaches switch to 2-and-1, trading four seats a row for three but adding shoulder room and a wider aisle. A handful of luxury or “party bus” style vehicles use conference pods or perimeter bench seating instead of forward-facing rows, which changes both the seat count and how you’ll want to group passengers.
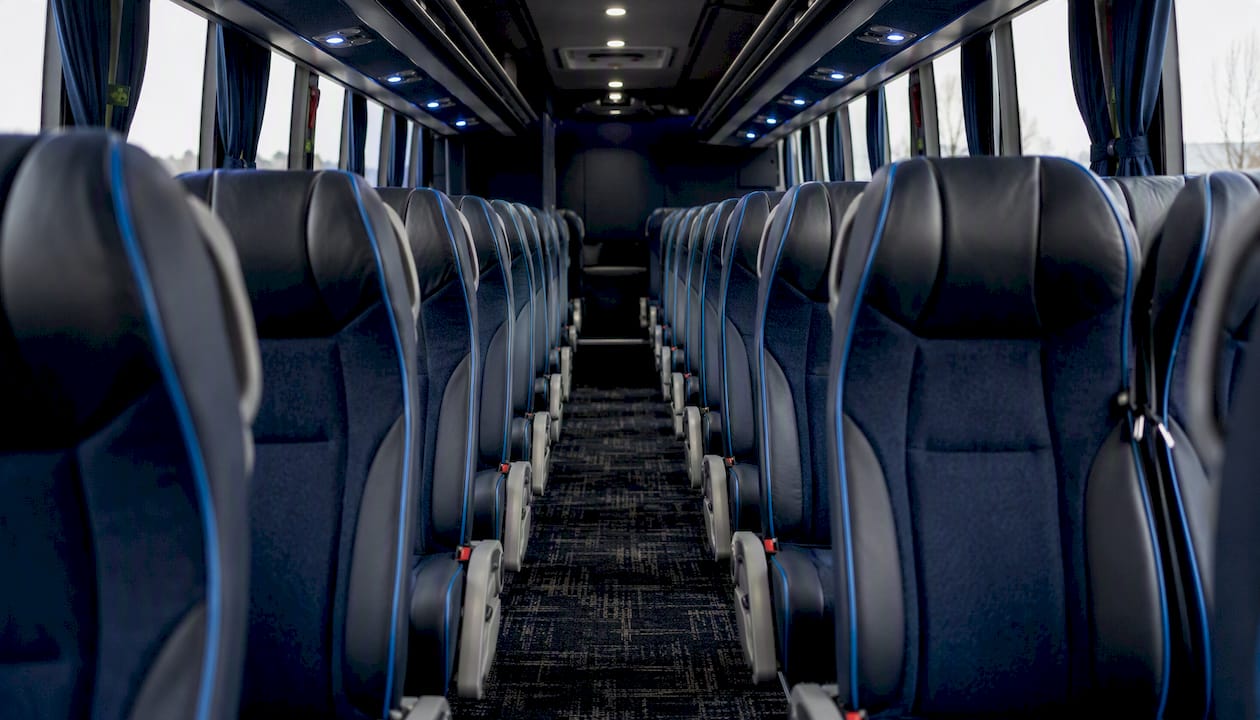
Seat width and seat pitch matter more than most organizers expect. Seat pitch, the distance between a point on one seat and the same point on the row behind it, typically runs around three-quarters of a meter on a well-appointed coach, and it strongly influences passenger comfort on multi-hour rides. Coaches built for longer routes often list seat pitch and amenities like power outlets directly in their spec sheets, so it’s worth asking for that document rather than guessing from a stock photo.
| Configuration | Typical Seat Count Impact | Best Use Case |
|---|---|---|
| 2-and-2 standard | Full headline capacity (40 to 56 seats) | Large wedding shuttles, tour groups, sports teams |
| 2-and-1 premium | Roughly 25% fewer seats than 2-and-2 | Corporate travel, VIP transport, longer routes |
| Rear restroom module | Reduces capacity by 2 to 4 seats | Any trip over an hour |
| ADA/wheelchair securement | Reduces capacity by a few seats per station | Accessible group travel, mixed-mobility guest lists |
Amenities eat into your headline seat count faster than people assume. A rear restroom module alone typically removes 2 to 4 seats from a coach’s advertised capacity, which is exactly why a “56-passenger bus” can quietly become a 52-seat reality once you see the actual floorplan. Extra legroom rows and wheelchair securement stations do the same thing on a smaller scale.
- Always request the floorplan, not just the seat number, before printing your chart.
- Ask whether the restroom is installed or removable, since some operators swap it out for extra seating on request.
- Confirm seat width if you have larger guests or musicians traveling with instrument cases.
Where Can You Download a Bus Seating Chart Template?
You have a few solid options, and which one fits depends on how much control you need over individual seat labels. Manufacturer floorplans, such as the Hagey seating-chart PDFs distributed alongside coach specifications, are often the most accurate source because they reflect the actual build of the bus rather than a generic diagram. Document services also publish fillable versions. A widely used example is the pdfFiller 56-passenger seating chart, which lets you type passenger names directly into labeled seat boxes rather than hand-writing them onto a static PDF.
- 56-seat template: the standard for full-size motorcoach wedding shuttles and large tour groups.
- 54-seat template: common on coaches with slightly wider premium rows near the front.
- 40-seat template: fits mid-size coaches used for bridal parties or single-team sports travel.
- 30-seat template: works for mid-size shuttles with added legroom or a restroom module.
- 20-seat template: matches minibus runs like airport transfers or small VIP groups.
The practical difference comes down to three document types. A manufacturer floorplan shows you the bus as built, restroom and all. An operator-supplied PDF map reflects the specific vehicle you’re being assigned, which matters because two coaches with the same headline capacity can have different layouts. A fillable template gives you editable name fields but assumes a generic floorplan that may not match your actual bus.
Pro Tip: If your event includes any ADA seating, custom decor blocking a row, or a non-standard restroom placement, skip the generic download entirely and ask your operator for the exact floorplan. A close-enough template causes more confusion at boarding than starting from scratch.
For a broader look at how seating diagrams work across different fleet sizes, tripiceland’s fleet examples show how capacity and layout choices shift across vehicle classes internationally, which is a useful sanity check if your group has unusual needs.
How Do You Create a Seating Chart for a Group Trip?
Start with a verified headcount, not an estimate. Include chaperones, a bus captain, vendors riding along, and anyone else who needs a seat but isn’t technically a “guest.” Then work through these steps in order:
- Choose the correct template based on your confirmed vehicle size and the operator’s actual floorplan, not just the advertised capacity.
- Mark wheelchair and accessible spaces first, before you assign anyone else, since these positions are fixed by the coach’s securement points.
- Reserve front rows for mobility needs and anyone requiring a quick exit, including guests prone to motion sickness.
- Block out family and group clusters so people traveling together stay together, especially for kids or elderly guests.
- Assign luggage allocations alongside seat assignments, particularly for teams with equipment bags or wedding parties with garment boxes.
- Produce a boarding order and printed run sheet that lists names, seat numbers, and any special notes for the driver or bus captain.
A simple zoning strategy works well for most events: front rows for mobility-impaired passengers and anyone who needs quick access to the door, middle rows for key participants like a wedding party or executive team, and rear rows for general guests. If your group tops 30 to 35 people with heavy luggage, consider splitting across two smaller vehicles rather than cramming everyone plus their bags onto one coach.
Pro Tip: Print physical name cards or a laminated seat map and hand it to your designated bus captain, not the driver. Organizers who dividegroups into priority boarding zones and use a printed list have cut boarding time on a 25-seat bus from 8 to 12 minutes down to under 3. That’s the difference between leaving on time and holding up your whole itinerary.
For last-minute additions, keep two or three seats intentionally unassigned near the back rather than trying to renumber your entire chart the morning of the event.
What Should You Know About Accessible Seating?
ADA-equipped coaches include features like a wheelchair lift, one or more securement points, and sometimes removable seats that convert a standard row into an accessible bay. Each securement station typically reduces the coach’s usable seat count by a small handful, which is exactly why the same “40-seat” bus can seat fewer passengers once accessibility equipment is factored in.
- Mark every securement location clearly on your seating chart, not just the general accessible zone.
- Note where service animals will ride, usually at the feet of their handler rather than in a separate space.
- Confirm where mobility devices like walkers or folding wheelchairs will be stored if they aren’t staying with the passenger.
- Ask the driver about boarding timing, since lift-assisted boarding takes longer and should be scheduled first, not last.
Pro Tip: Request three things from your operator before the trip: a verified floorplan showing exact securement spots, the total number of accessible positions available, and confirmation of how much extra boarding time the lift adds. Skipping this step is the single most common cause of day-of delays on mixed-mobility trips.
Which Seats Are Best, and What’s the Etiquette?
Seat choice affects comfort more than most passengers realize until they’re 45 minutes into a ride. Front rows near the door suit anyone prone to motion sickness or who might need a quick exit for medical reasons. Middle rows tend to feel the most stable on winding routes, which matters if you’re heading through the curves toward Hood River. Back rows near the wheel wells sit slightly higher and can feel bumpier, so they’re better suited to passengers who don’t mind a livelier ride.
A few etiquette basics keep a shared ride pleasant for everyone:
- Use headphones for music or video, even on short trips.
- Clean up trash and personal items before disembarking.
- Keep noise levels considerate, especially on early morning or late-night runs.
- Respect assigned seats, particularly on charters with accessibility or VIP zoning.
Emergency exits usually sit at the rear and sometimes at a mid-bus side door. Passengers seated in or near exit rows should have a clear aisle path, and your seating chart should never block that route with luggage or equipment, even temporarily.
Reading a 56-Passenger Seating Chart: An Annotated Example
A typical 56-seat motorcoach diagram includes several fixed elements you’ll see on almost every floorplan: the driver’s position at the front left, a restroom module usually built into the rear right corner, overhead storage bins running the length of the cabin, and underfloor luggage bays shown as a separate cutaway diagram beneath the seating layout.
| Zone | Typical Rows | Common Assignment |
|---|---|---|
| Front (rows 1 to 3) | 4 rows near driver and door | Mobility-impaired guests, bus captain, anyone needing quick exit |
| Middle (rows 4 to 10) | Center of the coach | Wedding party, executives, VIP guests |
| Rear rows near the restroom | Near restroom module | General guests, groomsmen, overflow seating |
| Restroom module | Rear right, reduces 2 to 4 seats | Not a seating zone; confirm exact row count with operator |
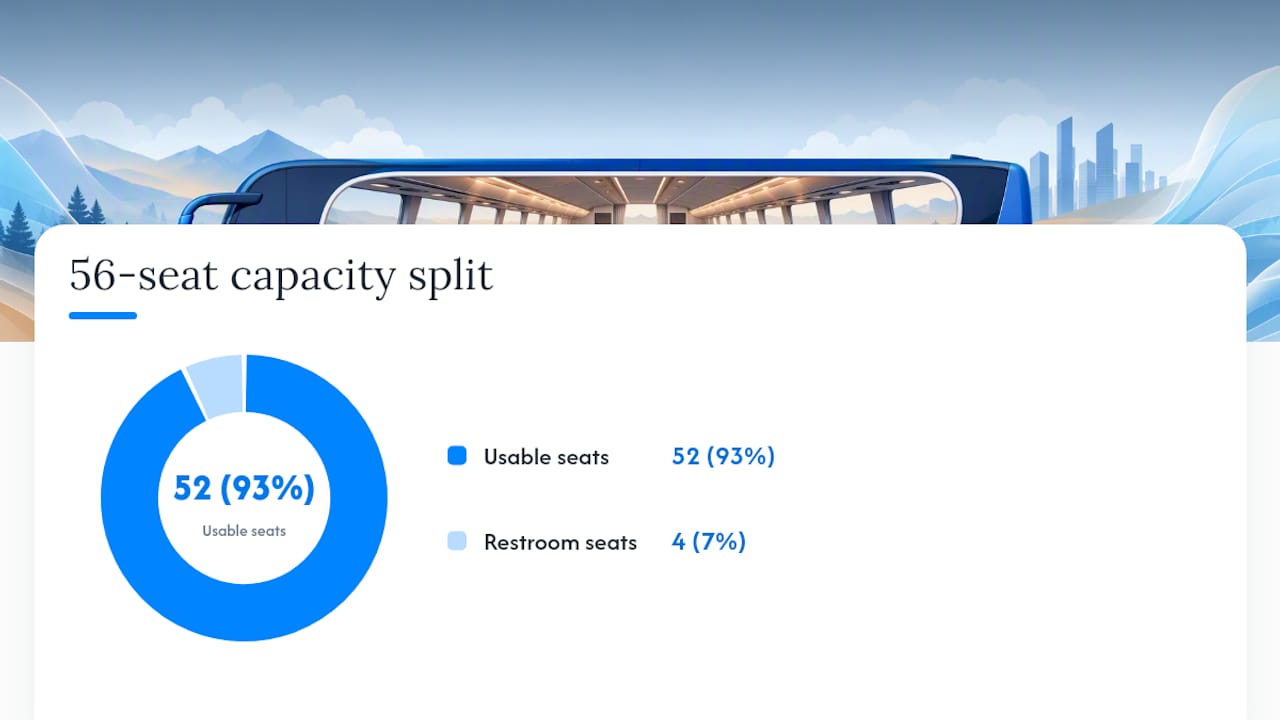
Here’s how that plays out in practice. Say you’re transporting 52 wedding guests on a bus advertised at 56 seats. The restroom module has already taken four of those seats off the board, so your real capacity is 52, a perfect fit with zero buffer. Front rows go to the wedding coordinator and any older relatives who need easier access to the door. Middle rows hold the wedding party and immediate family, kept together as one block. Back rows near the restroom take the rest of the guest list, with garment bags and gift boxes tucked into overhead bins rather than blocking the aisle.
Print This Checklist Before You Leave
The morning of your event isn’t the time to be second-guessing your seating chart. Run through this list before wheels roll:
- Final headcount confirmed against your printed seating chart.
- Printed boarding order handed to your bus captain, not just the driver.
- Luggage tally matched against underfloor bay capacity.
- Driver contact number saved in at least two phones among your group.
- Medical or accessibility notes shared with the driver privately, not announced to the group.
As a general timing rule, start boarding 15 to 20 minutes before departure for groups under 30, and closer to 25 to 30 minutes for full-size coaches with accessibility needs. If your final headcount creeps past what your chart comfortably fits, even with the buffer seats, that’s your signal to book a second vehicle rather than squeeze people in. Your bus captain, not the driver, should carry the printed run sheet and emergency contact list, since the driver’s attention needs to stay on the road.
What Operators Wish Organizers Knew About Seating Charts
The most common mistake I see isn’t a bad seating chart, it’s a seating chart built off the wrong floorplan. Organizers download a generic 56-seat template, fill it in carefully, and then discover on the day of the event that their actual bus has a restroom module their template didn’t account for. My advice: confirm the exact floorplan with your operator 48 hours before departure, not the week before. And always supply your luggage count alongside your headcount. Operators plan underfloor storage based on that number, and a surprise pile of garment bags or gift tables can force last-minute seating changes.
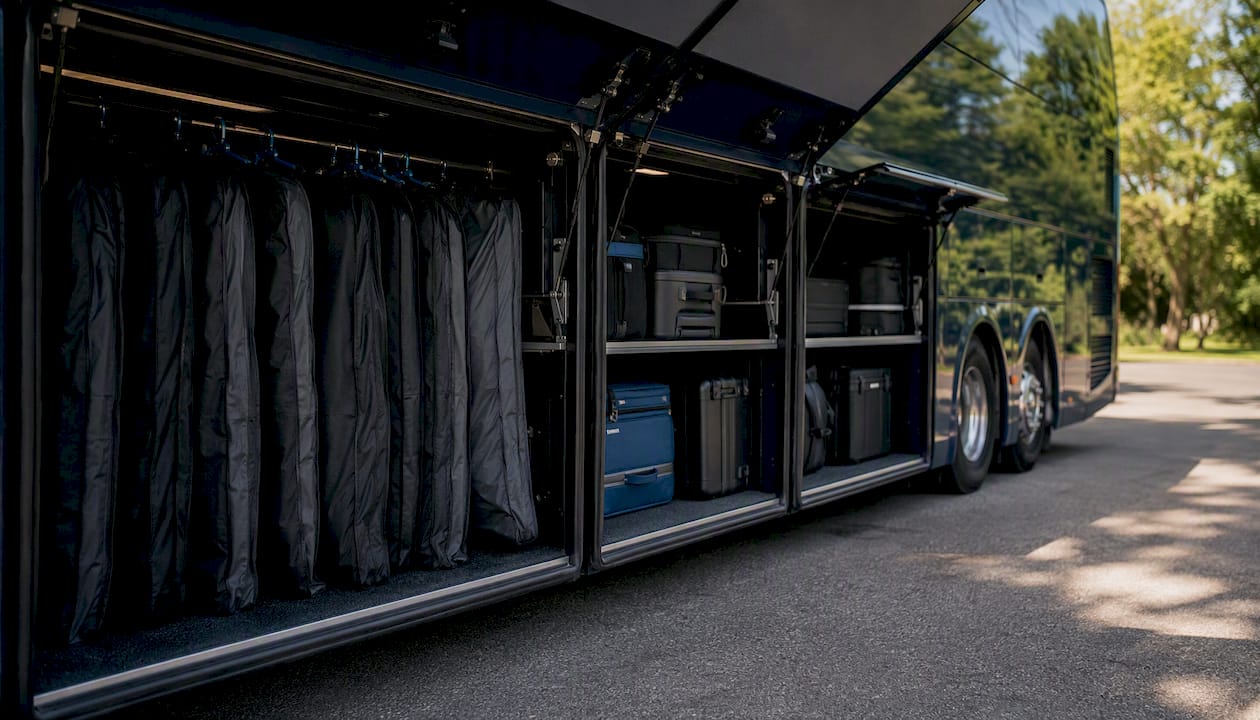
For weddings and wine country tours through the Willamette Valley, the choice between a mid-size coach and a full-size motorcoach usually comes down to two things: guest count and stops along the route. A mid-size coach handles a single venue-to-venue shuttle well, but if you’re weaving through multiple wineries or hotel pickups, a full-size coach with more storage and a restroom gives your group more breathing room over a longer day. An operator who can hand you the exact floorplan for your assigned vehicle, not a stock diagram, is the difference between a seating chart that works on paper and one that works on the actual bus.
Get Your Seating Chart Built Around Your Actual Bus
Reliant Transportation handles that confirmation directly for every group we serve across the Portland metro, the Willamette Valley wine country, and Hood River, so your seating chart matches the bus that actually shows up.

Request a floorplan and we’ll walk you through seating assistance, boarding-run coordination, and luggage planning before your event date, not the morning of. When you reach out, have three things ready: your final headcount, your luggage count, and any accessibility needs your group has. For wedding parties specifically, our wedding shuttle page covers how we handle guest zoning and vendor coordination, and our regional trip examples show the amenities available on different coach sizes. Ready to lock in your floorplan? Contact Reliant Transportation to request your seating template or ask about an on-site coordinator for larger events.
Frequently Asked Questions
What is a charter bus seating chart used for?
It maps every passenger, piece of luggage, and accessibility need to a specific seat on your assigned coach, which speeds up boarding and prevents confusion at departure.
How many seats does a standard charter bus seating chart cover?
Most templates cover 56, 54, 40, 30, or 20-passenger coaches, matching the sizes charter operators run most commonly.
Does adding a restroom reduce the number of seats on a charter bus?
Yes. A rear restroom module typically reduces usable seat count by 2 to 4 seats compared to the coach’s headline capacity.
Where can I find a printable charter bus seating chart template?
Manufacturer floorplans, operator-supplied PDFs, and fillable seating-chart templates from document services are the three most common sources, with operator diagrams being the most accurate for your specific vehicle.
How do I plan seating for wheelchair or accessibility needs?
Ask your operator to confirm the number of securement spots, mark those positions on your chart first, and request boarding timing that accounts for lift-assisted loading.
Sources
When accuracy matters more than convenience, lean on primary sources rather than generic templates.
- Charter Bus Group Travel: Tips for Planning a Comfortable trip — Travel Intelligence
- Understanding charter bus seating capacity for group travel — TripTScript
- Inside the charter bus: optimizing group transportation for hospitality and travel professionals — Mobility for Travel